Tuesday, September 13, 2011

Apple Hand Pies - As Fall Begins in Michigan


The signs of fall are everywhere here in Michigan. The outside temps have turned decidedly more cool.  My flowers are beginning to wither, the leaves have begun to fall and that fall-like smell I love is in the air. For me, autumn is one of my favorite times to cook and bake as many of the foods and dishes associated with the season I particularly enjoy.

To usher in the season I have decided to make Apple Hand Pies. This time with dried cranberries added to the filling for color and texture. The filling is then wrapped in a walnut enhanced pie crust. I debated whether to go the easy route and use packaged phyllo dough but decided to do them right and chose my default pie dough recipe from Martha Stewart. This time, however, I've added some finely chopped walnuts for extra texture and taste. The basic recipe is my dough of choice for most of the fruit and cream pies I make. I like the use of butter as the main fat to give the dough a rich flavor. The small amount of Crisco in the recipe helps produce a nice tender, flaky crust. Put together in a food processor, the dough is easy and quick to prepare.

While these hand pies are really nothing more than an adaptation of an apple pie, the filling is pre-cooked to allow for a shorter baking time. Unlike in a pie where I prefer the look and texture of  layers of sliced apples, the apples here are diced and then sauteed in butter and sugar before placing them on rounds of raw dough.

These are certainly tasty served with a good vanilla ice cream while still warm, but are also quite good simply eaten by hand.
Apple Hand Pies

Walnut Pie Dough:
2 1/2 c. flour
3/4 c. cold butter, diced
1 tsp. salt
1 tsp. sugar
1/4  c. Crisco
1/4 c. - 1/2 c. ice water
1/2 c. chopped, toasted walnuts

Toast walnuts in a 350 degree oven for about 5-10 minutes to toast and enhance flavor. 
Place nuts into a food processor and pulse till nuts are finely chopped but not turned into a powder. Add the flour, salt and sugar and pulse a few times again to incorporate all the dry ingredients.   


Now add the cold butter and Crisco and pulse again a few times till mixture is meal-like. Add the water starting with 1/4 c. and pulse till dough comes together. If still too loose, add a bit more water till it forms a dough when squished together by hand. 


Turn out onto a lightly floured surface. Collect dough and form into a round trying not to handle to much. Wrap in plastic wrap and refrigerate for 30 minutes. While dough is chilling prepare apple filling.


Apple Cranberry filling:  recipe adapted from "Professional Baking" by Wayne Gisslen

2 pounds apples, medium dice
1/4-1/3 c. dried cranberries
2/3 c. sugar, divided 
2 T. cornstarch
2 oz. cold water
2 T. butter, divided
2 T. lemon juice
1 tsp. ground cinnamon
1/4 tsp. nutmeg
pinch of salt


In a medium skillet melt 1 T. butter but do not let it get brown. Add the diced apples and cook for a few minutes till they just begin to soften. Add 1/3 c. sugar and cook till tender but not mushy.
Mix the cornstarch with water to make a slurry and add to the apples.  Cook till thickened and the liquid is clear.


Take off the heat. Add the remaining 1/3 c. sugar, the spices, salt, cranberries, lemon juice and butter. Mix together till sugar is dissolved and butter has melted. Set aside to cool.


Assembly:
Cut dough in half. Roll out first half into a rectangle or large circle that is about 1/8-1/4 inch in thickness. Using a 6-inch plate as a guide, cut out as many circles as possible. 


Place cut circles on baking sheet.  Wet the edges of the dough circle. Spoon 2 generous tablespoons of the filling into half of the dough circle. Fold over, cut small slits to vent the dough, seal and crimp.  Repeat with second half of dough and any remaining dough scraps.


Brush milk or egg wash over the tops. Sprinkle with a mixture of sugar and cinnamon. Bake in a 400 degree oven for 30 minutes. Cover with aluminum foil if crust begins to burn.


Wednesday, September 7, 2011

Frittata di Pasta (Pasta Frittata)


Had my fill of BBQ this weekend. After a big family party on Saturday in sweltering hot conditions (no air conditioning) and another cook-fest on Sunday I'm a bit pooped!  Now back home from the lake I don't have much in the frig and don't feel like trekking to the grocery store. On occasions like this I fall back to one of my most favorite and simplest of comfort foods, the pasta frittata. With some cooked spaghetti, a few eggs and cheese (ingredients most households have on hand) I can put together a delicious entree that everyone in my family enjoys. My mother used to make this dish on Fridays when Catholics abstained from meat, but I like to make it whenever I am in a pinch, any day of the week.

This is a delicious meatless dish, but adding sliced or crumbled pieces of cooked Italian sausage gives this dish an incredible boost of flavor. I prefer to make the frittata in its simplest form, with plain, cooked spaghetti and good Italian cheese, but if you have some leftover pasta coated in tomato sauce already sitting in the refrigerator, that's even tastier. This is a design-your-own kind of dish as any meat, vegetable, herb or spice can be added to suit your tastes. Oh, and the pasta can be spaghetti, penne or any other shape you like.

Essential to making this dish is a good, medium size, non-stick skillet or a well seasoned one that you have confidence the eggs or bits of cheese won't stick to. Like most frittatas, this one needs to be flipped in order for the eggs to cook through, but the pasta in this dish adds considerable volume, so flipping it is a bit tricky and somewhat intimidating. Though flipping and cooking both sides in the skillet produces a pasta frittata that has a nice crisp crust to it, once the eggs have fully set the balance of the cooking can be done in an oven, making sure, of course, you are using an oven-proof skillet.

The frittata is cooked in olive oil. With its larger than usual volume the cooking time is long so you must keep the heat even and not too hot. But, you want it hot enough for the surface and edges to develop a nice golden brown. This means the pasta at the surface will crisp up a bit which gives this dish great flavor and added texture. Both my husband and I think that's the best part of this dish. 

As for the cheese, my mother always used Tuma cheese which was a staple in her house.  Tuma is a cow's milk cheese that has a firm, smooth texture similar to a muenster or mozzarella but milder in taste. It was mom's default cheese. She used it in everything, grated in lasagna or stuffed pastas, sliced for sandwiches or to top an eggplant parmigiana.  Tuma is not readily available in grocery stores but can be found in most Italian specialty markets. As such, I use whatever cheese I have on hand, fresh mozzarella, muenster, provolone, or even swiss. 

In this dish the cheese is diced up into small pieces. I don't mix the cheese with the eggs and pasta mixture for fear it will adhere to the skillet and cause the frittata to stick. I add the cheese in parts as I pour the egg-pasta mixture into the skillet carefully distributing it throughout the skillet without allowing it to touch the pan.

I typically make this as a dinner entree served with a big, green tossed salad, but it is also great for lunch. It is good either hot right out of the pan, at room temperature or cold the following day.  Be sure to sprinkle generous amount of fresh grated cheese on top when serving. As usual, I prefer Grana Padano.  

What a satisfying dish, not too rich or too heavy. It has a great mix of textures, smooth and chewing in the center, with a nice crispy crust. And, depending on the cheese you pick, a nice salty, chewy, cheesy taste to balance out the blandness of the plain pasta. Delicious!


Frittata di Pasta

4-6 oz. of cooked spaghetti, well drained
4 eggs
pinch of salt and black pepper
1/2 c. cheese, diced or small slices tuma, mozzarella, muenster is best

good olive oil for frying
Grated Parmesan cheese


Cook pasta as directed on package. Drain well. 


In a large bowl beat eggs vigorously till well beaten. Season with salt and pepper. Add the cooked and well drained pasta and mix together. 


Heat a medium size, non-stick skillet. Add enough good olive oil to fully coat the bottom of the skillet, about 2 T. When oil is hot but not smoking, add enough of the pasta mixture to coat the bottom of the pan. Sprinkle with some of the cheese making sure none of it touches the bottom or sides of the pan. Continue adding more of the pasta-egg mixture and more cheese till both are in the skillet and the cheese is well distributed making sure the pasta-egg mixture covers all of the cheese. 

While cooking, gently lift (without mixing or disturbing) the frittata from time to time to distribute the egg mixture, make sure the bottom is not burning or sticking to the bottom or sides of the pan. 


When the frittata appears generally well set (center is still runny but sides are beginning to firm up), place a dinner plate over the frittata (dish should be slightly larger than the skillet diameter). With your right hand, firmly hold the skillet handle. Place your left hand onto the center of the dinner plate. In unison, gripping the handle firmly and securing the plate onto the skillet, lift the pan off the heat and turn the pan 180 degrees so that the frittata is resting on the dinner plate. Lift the pan off the frittata and place it back on the stove. Now slide the frittata into the skillet runny side down, cooked side up, to finish cooking.


When fully cooked (center will be firm to the touch) slide onto a clean dinner plate. Sprinkle with a generous amount of grated Parmesan cheese. Cut into 6-8 pie wedges and serve.


Tuesday, August 30, 2011

Pesto Presto!

It's that time of year again. The basil plants I have in my garden and in the pot that sits on my deck have reached their peak. Now beginning to flower, its time to harvest them before they turn bitter. For me that means making lots of pesto and freezing the leaves for use throughout the winter. These are good ways to make use of the plants abundant foliage, which always produces way more than any one cook could use. I always make multiple batches of the pesto and  freeze a dozen or more bags of the leaves, plenty to share with family and friends. The only thing I don't do is dry the basil as I simply don't like the taste of it in anything.

Making the pesto requires a good amount of time though the process is not at all difficult. The pesto making process itself is rather quick and easy. What takes the most time is harvesting the basil, picking the leaves off the stalks, and then cleaning the leaves to get them ready for freezing or pesto making. Once the leaves have been washed and dried, processing them should be done at once before the leaves begin to oxidize and turn brown. 

Regardless of recipe, pesto ingredients are pretty standard: large handfuls of clean, fresh basil leaves, garlic, pine nuts, very good extra virgin olive oil, butter and freshly grated Parmesan cheese. Pesto nowadays can be made with just about any green veggie or herb with many not even containing basil. It's the process of preparing it that now defines the word. 

The recipe I typically follow is from Marcella Hazan's Essentials of Classic Italian Cooking cookbook. It's an excellent basic pesto recipe that I make with a few modifications. She recommends using a combination of both parmigiano-reggiano and pecorino-romano cheeses, while I simply use Grana Padano cheese. She uses a food processor for making a portion of the recipe, while I prefer a less complicated process and use it to make the entire recipe. Marcella also suggests that when freezing the pesto to leave out the cheese and butter. I do that for some batches which make them better additions to some dishes. I have found, however, that pesto with the cheese and butter included, freezes just as well.  I use pesto mostly as an easy and rich sauce to coat pasta, but I also like it as a spread in sandwiches or added to a soup or stew for a wonderful boost of flavor. 

For this blog I prepared 3 batches of pesto, 1 with cheese added and 2 without any cheese or butter. The recipe is written for a single complete batch which will produce about 2 cups of sauce, enough to coat up to 2 lbs. of cooked pasta.  While pesto is quite wonderful over pasta it certainly is not the only way to use it, so I have included a recipe for an easy, hot (or room temperature) potato salad side dish. 


Basic Pesto

2 cups fresh basil leaves, tightly packed
3 T. pine nuts
2 cloves of garlic
pinch of salt 
pinch of black pepper
1/2 c. extra virgin olive oil
3 T. room temp. unsalted butter
1/3 c. freshly grated Grana Padano cheese

If preparing for freezer, do not use the cheese or butter. They can be stirred into the thawed pesto when ready to use. 

In a small skillet very lightly toast the pine nuts watching carefully as they can burn quite quickly. Remove and set aside.

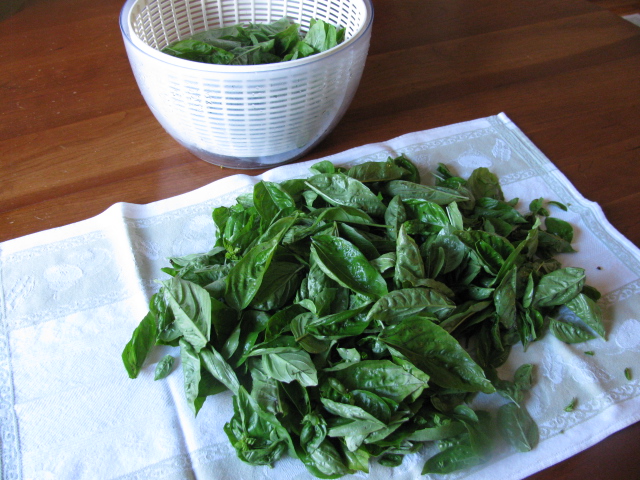
Prepare the leaves by first shaking the stalks over a spread of newspaper and shake off any loose surface dirt and bugs.  Now pick off all the leaves discarding any yellowed or  badly bruised ones off the stalks. Wash the leaves in cold water, put in a lettuce spinner and spin dry. Then spread the leaves onto a clean kitchen towel and wring dry to remove as much moisture as possible from the leaves.

In a food processor add the garlic and pulse till finely minced. 

In this order add the packed basil leaves, pine nuts, salt and pepper, cheese (if using) and butter (if using). 
 
Pulse till mixture is very finely minced. 

Now with the food processor running, pour the olive oil in an even stream into the pesto till well incorporated. 

The sauce is now ready to use by simply adding to hot, just drained pasta. Add a tablespoon or two of the hot pasta water to loosen the sauce, if necessary. 

Freezing Basil Leaves

Follow the same procedure for preparing and washing the leaves for pesto as described above.  Then simply pack the leaves into quart size or snack size freezer bags that have been properly labeled. Squeeze out as much air as possible, seal and put into the freezer. When ready to use, simple remove what you need from the freezer in their frozen state, crush with your hands and add to recipes.  The flavor is very close to fresh. Please note that the leaves will blacken when thawed and cannot be used in fresh salads or cold dishes. 


Potato Salad with Pesto 

3 large potatoes
1 zucchini, chopped
2-3 green onions, chopped
1 c. frozen peas, thawed
salt & pepper to taste
3 T. prepared pesto (with cheese)
1-2 T. olive oil

Cut potatoes into medium large chunks. Steam for 10-15 minutes till fork tender.  

In a skillet, heat a very small amount of oil and add the zucchini, peas and onions (both white and green parts). Saute just until zucchini is tender, but not soft. 

Pour potatoes into a bowl. Add the pesto and mix together. 
Add the vegetable mixture. Stir and serve.  


Tuesday, August 23, 2011

Broccoli Rabe with Orecchietti Pasta

I am a big fan of greens and make them often. While many people object to the bitter taste of some greens I like all varieties and so does my family. Most greens are relatively cheap in price and a good value with great health benefits to boot. They are great as a simple side dish gently sauteed in olive oil and garlic. I also like to add them to soups, especially hearty bean soups for added texture and taste. 


Among my favorite type of greens is broccoli rabe, or "rapini" as I came to know them when growing up.  Not so readily available back then, when my mother got her hands on a nice bunch she would saute them in olive oil, garlic and cut-up cooked potatoes. I make all types of greens in this way today, so easy and a good way to spark up a simply grilled meat or fish entree.  

Today, broccoli rabe is a standard vegetable in most grocery stores but tends to cost more per pound than most greens. When they go down to about $1.99 a pound its time to buy. 

Broccoli rabe falls into the bitter category of greens. To cut some of the bitterness most recipes suggest cooking the greens in some salted water for a few minutes. I don't think that's necessary and frankly why boil away some of its nutrients. One way to balance the bitter taste is to prepared the greens with other ingredients. Potatoes, like my mother used to do, is a good option. One of my favorite ways to prepare them is to saute the greens with Italian sausage, lots of garlic and a dash of pepperoncini flakes. Add in some cooked orecchietti pasta and you have a marvelous entree or satisfying primi piatti course. Take out the Italian sausage and you have a flavorful side vegetable and starch all in one like the recipe I am presenting today. 
 
Broccoli Rabe with Orecchietti Pasta

1 bunch broccoli rabe
3 cloves garlic, thinly sliced
1/4 tsp. pepperoncini flakes
1/2 lb. orecchietti pasta
olive oil
salt, to taste
Parmesan cheese, grated

Trim broccoli rabe cutting off the thicker stalks. Rinse well with cool water and drain well or spin dry.  Stalks can be either left whole (my preference) or chopped. 


Prepare pasta according to package directions. Cook only till almost al dente (a minute or two less than directions).  No more as pasta will finish cooking when added to the broccoli rabe.When done, remove a 1/2-1 cup of pasta water and then drain the pasta.


While pasta is cooking, heat a large skillet and add about 2-3 T. olive oil. When hot, add the garlic and pepperoncini flakes making sure not to burn the garlic. When garlic has begun to soften and is quite fragrant add the broccoli rabe.

Turn down the heat slightly, season with salt and stir mixture. Add about 2 T. water, cover pan and cook till broccoli rabe is almost done (stalks are tender but not soft).  

Add the orecchietti to the pan along with some of the reserved pasta water. Continue to saute the mixture till all ingredients are well combined and most of the water has evaporated. 

Serve with a generous sprinkle of grated Parmesan cheese. 


Tuesday, August 16, 2011

Chocolate Amaretti Cake


It rained cats and dogs all weekend at the lake. Add windy conditions and a considerable drop in the outside temperature, it seemed more like fall than summer. Stranded inside for the weekend it was a perfect time to bake. I had purchased some amaretti cookies a few weeks back for a Chocolate Amaretti Cake recipe I had intended to make for a family party which we cancelled due to a family emergency. With all the necessary ingredients waiting to become something it seemed the right time to finally tackle the recipe. It comes from Giada De Laurentiis’ Everyday Italian cookbook. It was the first time making the recipe. Based on the results I would make it again, however, with a few minor adjustments.

This is essentially a chocolate flavored flourless cake.  Ground almonds and crushed amaretti cookies replace the flour and provide the structure for the cake. I am a big fan of almond flavored anything and selected this recipe expecting the nuts and cookies to deliver that rich almondy taste I like so much in pastries and desserts. No so.  Chocolate is the predominant flavor though it is subtle rather than rich (using dark or bittersweet chips instead of the prescribed semi-sweet would likely enrich the flavor). 

Less dense than most flourless cakes, it is quite moist and slightly fudgy, with the nuts and cookies providing texture and a satisfying slightly crunchy bite. The recipe calls for the zest of 1 orange which overpowers the flavor of the cake on the first cut, but seems to dissipate and becomes almost undetectable the next day.  All in all, in spite of the fact that the almond taste I craved was not there, (I would add a teaspoon of almond extract next time) the cake is quite delicious and a great choice for a dinner party dessert. Not too sweet or rich, and simply wonderful with a good cup of coffee.

Chocolate Amaretti Cake

3/4 c. semi-sweet chocolate chips
1 cup slivered almonds
1 cup (about 2 oz. amaretti cookies)
1/2 c. unsalted butter, room temp.
2/3 c. sugar
2 tsp. grated orange zest (1 orange)
4 large eggs
2 T. unsweetened cocoa powder
2 T. sliced almonds 


Heat oven to 350 degrees. Spray a 9 inch springform pan with nonstick spray. Spread the 2 T. sliced almonds over the bottom of the pan and refrigerate.

In a small bowl, microwave the chocolate chips, stirring every 30 seconds, until melted and smooth, about 2 minutes. Set aside to cool.


In a food processor (I used a mixer instead), combine the almonds (I used sliced almonds instead slivered) and cookies, and pulse until finely ground.  Transfer to a bowl.  Add the butter, sugar and orange zest and blend until creamy and smooth.  With the machine running add the eggs, one at a time. Add the nut mixture and the melted chocolate. Pulse until blended. 


Pour the batter into the prepared pan.  Bake until the center puffs and tester inserted into the center of the cake comes out clean, about 35-45 minutes.  Cool the cake in the pan for 15 minutes. Transfer to a platter, and sift the 2 T. cocoa powder over the top and serve.